- Published on
- • VueJS • 0 views
Embedding Tableau the VueJS Way!

VueJS is a Progressive JavaScript Framework that makes creating single page applications a whole lot easier than using traditional methods. In this blogpost I'll explain how to use this framework when you want to start embedding Tableau dashboards.
Embedding Tableau dashboards is done with the Tableau JavaScript API. Through this API you can integrate dashboards in other systems. Which means you can have these systems start 'talking' to your Tableau visualisations. With the new embed license it's a lot easier for customers to start enabling outsiders to interact with dashboards on their server. VueJS, on the other hand, makes it a lot easier to scale and deploy large embed systems because it's easy to pick up and it can integrate with other libraries and projects.
All the JavaScript API examples on the Tableau website are a bit outdated and don't accommodate for frameworks such as React, Angular and VueJS. In this blog I'm taking the latter and want to show you how easy it is to integrate the JavaScript API in VueJS.
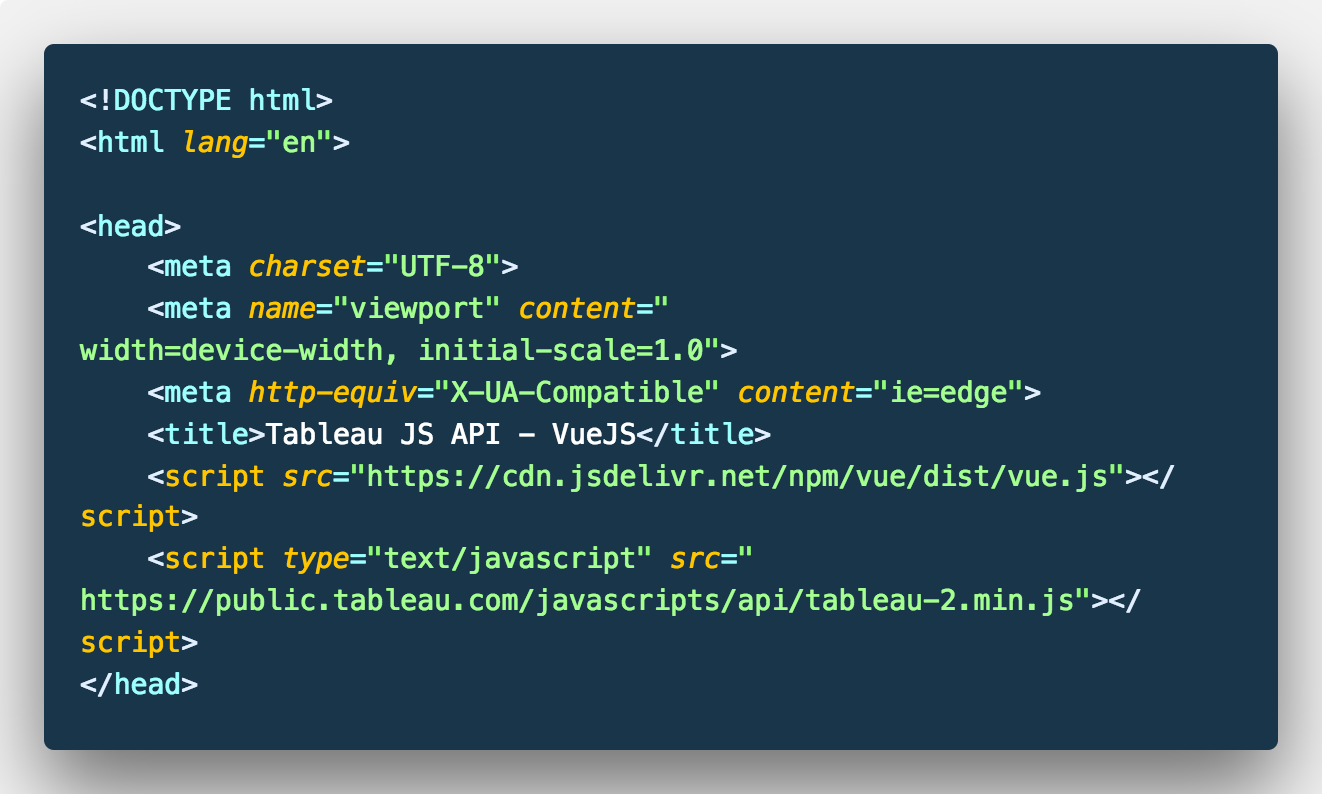
We start of by creating an index.html file with a script tag for VueJS and Tableau's JavaScript API.

You can see we are just using a CDN to load VueJS. You could also use the VueJS CLI, and this would lead to the same result. In this blog I'm however, just including the script tag.
I'm also copying the basic embed example on the Tableau website. Hence I'm including the JavaScript API for Tableau Public.
The next step is to add a div to the main HTML file with an ID so we can hook our Vue instance to it. Everything you're doing after this will go inside of this container.
Now it's time to instantiate the Vue instance. You can do that by using an inline script tag, or using a separate JavaScript file. Because this is a basic example I'm just using the former.
You can see that 'el' refers to the main app container which we specified in the body of our HTML file. I'm also including the 'data' option in my Vue Instance. This data option only returns one string: 'Hello Tableau fans'.
Now let's add this msg string to the HTML page. Therefore you need to change the main div to this:
{{ msg }}
What this now means is that the DOM and the data that we instantiated are now linked and 'Hello Tableau Fans' is now the title of our page. VueJS calls this Declarative Rendering — play with the msg string and change it to something else to see how the DOM responds… that's pretty cool right?
Okay, let's now hook up a Tableau dashboard. For that we need a URL. I'm going to use the Tableau embed example one. We can add this url to our data like so:
data() {


return {


msg: 'Hello Tableau Fans!',


url: "http://public.tableau.com/views/RegionalSampleWorkbook/Storms"


}
Because our data returns an object we're in fact just creating key-value pairs here. The good thing now is that we can also add another object here. This object can contain the option values we want to give to our Tableau viz. In this case we only pass in the option to hide the tabs on a visualisation, but you can pass in many other options.
data() {


return {


msg: 'Hello Tableau Fans!',


url: "http://public.tableau.com/views/RegionalSampleWorkbook/Storms",


options: {


hideTabs: true


}


}


}
After this we need to create a function that we need to call when the DOM gets loaded. In the basic example Tableau hooks this up to a div that it creates in the DOM. We can do something similar with VueJS. What we need to do first, is create a new div inside of our app div.
{{ msg }}
You can see something new here, a 'ref'. We're using this to tell the Tableau JavaScript API to put the iframe with the dashboard in there. We do this as follows. We're first creating a method. This method is a function (initViz) that returns the viz object with its options and the reference to the div.
methods: {


initViz: function () {


let viz = new tableau.Viz(this.$refs.tableau, this.url, this.options);


}


},


mounted: function () {


this.initViz()


}
You also see something called 'mounted' here. It's not completely correct but you can compare mounted with the document.ready() in jQuery. Which basically means, whenever the DOM has loaded, replace everything in the app div with what we specified in el. So in this case that means that whenever the page finished loading, execute the function called initViz.
And there you go. Your dashboard should load now!
You can grab the full code form my Github page here.