- Published on
- • Tableau • 0 views
How to quickly scaffold a Tableau Extensions Manifest file

One of the first things you need to do when you start developing a Tableau Extension is to create a manifest file. Until now there was no quick way to quickly create this file. You had to go the the Tableau Github page and copy the contents of the sample file. However, after some quick dev-ing I created a CLI (command line interface) tool that you can use to rapidly scaffold such a file.
Note: I created this utility and it is therefore not officially maintained by Tableau. If you have any questions or have found any bugs please contact me directly.

The problem
Ever since Tableau released the Extensions API I’ve been a bit annoyed that I have to manually create a .trex file. This trex file is used for registering your Extensions and it basically tells Tableau where the extension can be found, who created it, their contact details and version history. In this manifest file you also have to specify if you want to use a configuration menu – the little menu dropdown on the dashboard object – and if the extension needs to access the underlying data of your workbook. I’ve written about this trex file before so if you want to learn more then go here
The solution
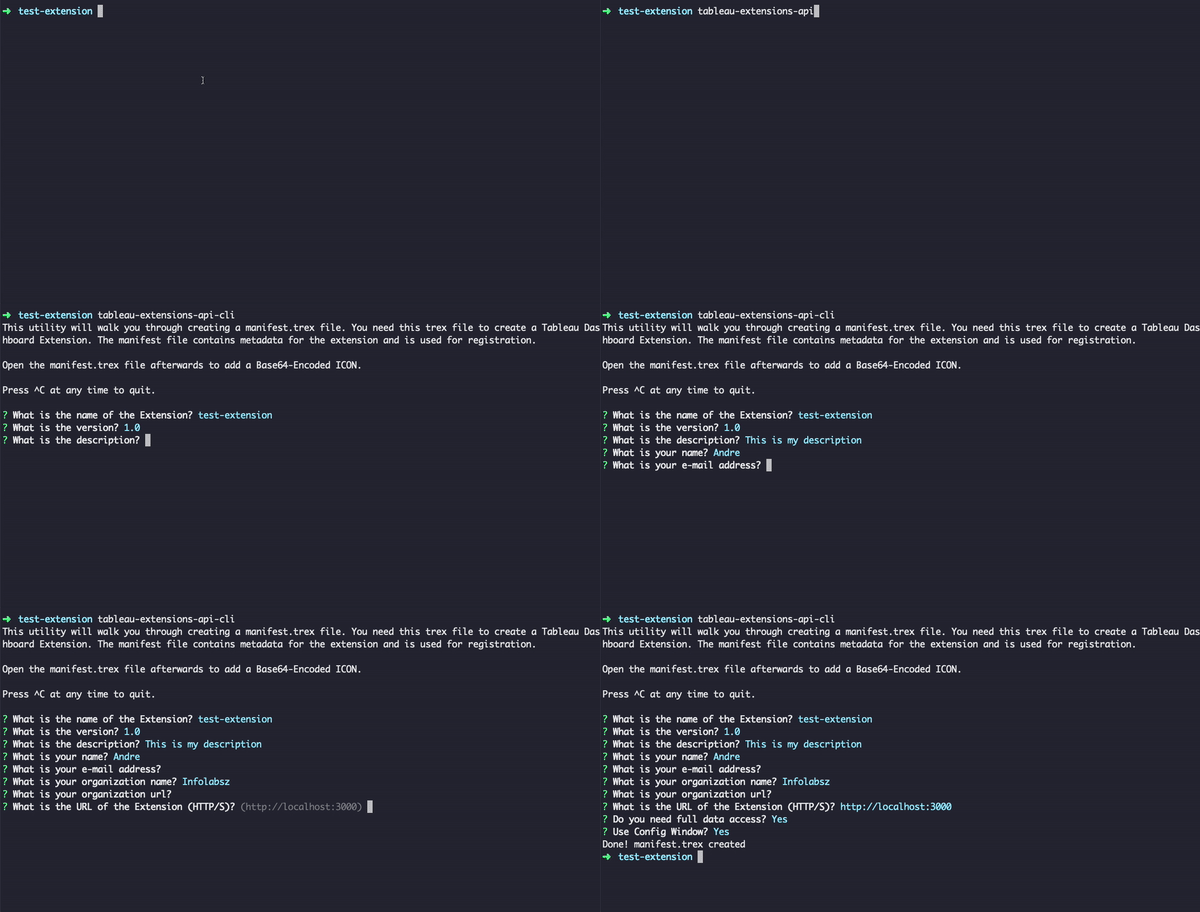
I don’t want to create such a file manually. Therefore I created the tableau-extensions-cli tool. You can see it in action in the animated gif above. You install it globally once and then you can use it anywhere on your machine. Follow the instructions below to install it:
- Visit the npm page of this utility here
- Open a new terminal window – or CommandPrompt / PowerShell if you are still using Windows.
- Make sure you have NodeJS installed. You need it for building extensions anyway so if you don’t have it please install it – you can test if you have it installed by typing node.
- Once you got node installed you run: npm i tableau-extensions-api-cli -g
- The -g stands for a global install. This means you can run the command in Step 7 anywhere on your machine
- Create a new folder and change directory into that folder. This will be the folder where you are going to develop your extension and the manifest file will be created
- Now run: tableau-extensions-api-cli
- Answer the questions that are prompted to you and once you have finished answering all the questions you should see a manifest.trex file in your folder
You can run this command as many times as you want in case you made a mistake in your trex file. The utility should ask you if you want to overwrite the existing trex file.
Let me know if you found any bugs or run into errors. If you read the npm page that I mentioned in Step 1 you saw that I had a problem with installing one of the dependencies but solved it with installing the Xcode command line utilities from Apple’s website.
Update August 2019: when installing this on several other machines I ran into problems with a package that I’m using: node-gyp. You might see these errors showing up in your command line interface. Please follow the instructions on this page to properly install this package. If you still run into problems please contact me.
Happy dev-ing !👋