- Published on
- • Tableau • 0 views
What’s this new Tableau .trex filetype?
With the release of Tableau's latest instalment, version 2018.2, we now have the ability to use extensions in our dashboards. You can download these from the official Tableau Gallery, which was also launched together with 2018.2. I've played around with this Extension API since it's very first alpha release just after the Tableau Conference in Las Vegas last year. And I can tell you, you can do some pretty awesome things with it. The web applications that I built range from a simple countdown clock that refreshes your data source all the way to being able to run Alteryx workflows and analytic apps in your dashboard. I've reserved explaining you how to do that for another time, because I want to focus first on a new file type that a lot of users will see popping up in their downloads folder: the .trex file.
What does that actually mean? .trex
A .trex file is what they call a manifest file. If we ask good old Wikipedia what a manifest file is, we get the following definition:
A manifest file in computing is a file containing metadata for a group of accompanying files that are part of a set or coherent unit. For example, the files of a computer program may have a manifest describing the name, version number, license and the constituting files of the program.
So a manifest file basically gives Tableau information about where to find things and how to interpret it. The Extensions team at Tableau had some fun with creating a name for this file type because it literally stands for 'Tableau Extensions' but with the 'r' added in we get... trex! Hence you also see an image of a smiling dinosaur on the top of this page.
How and where can I create one?
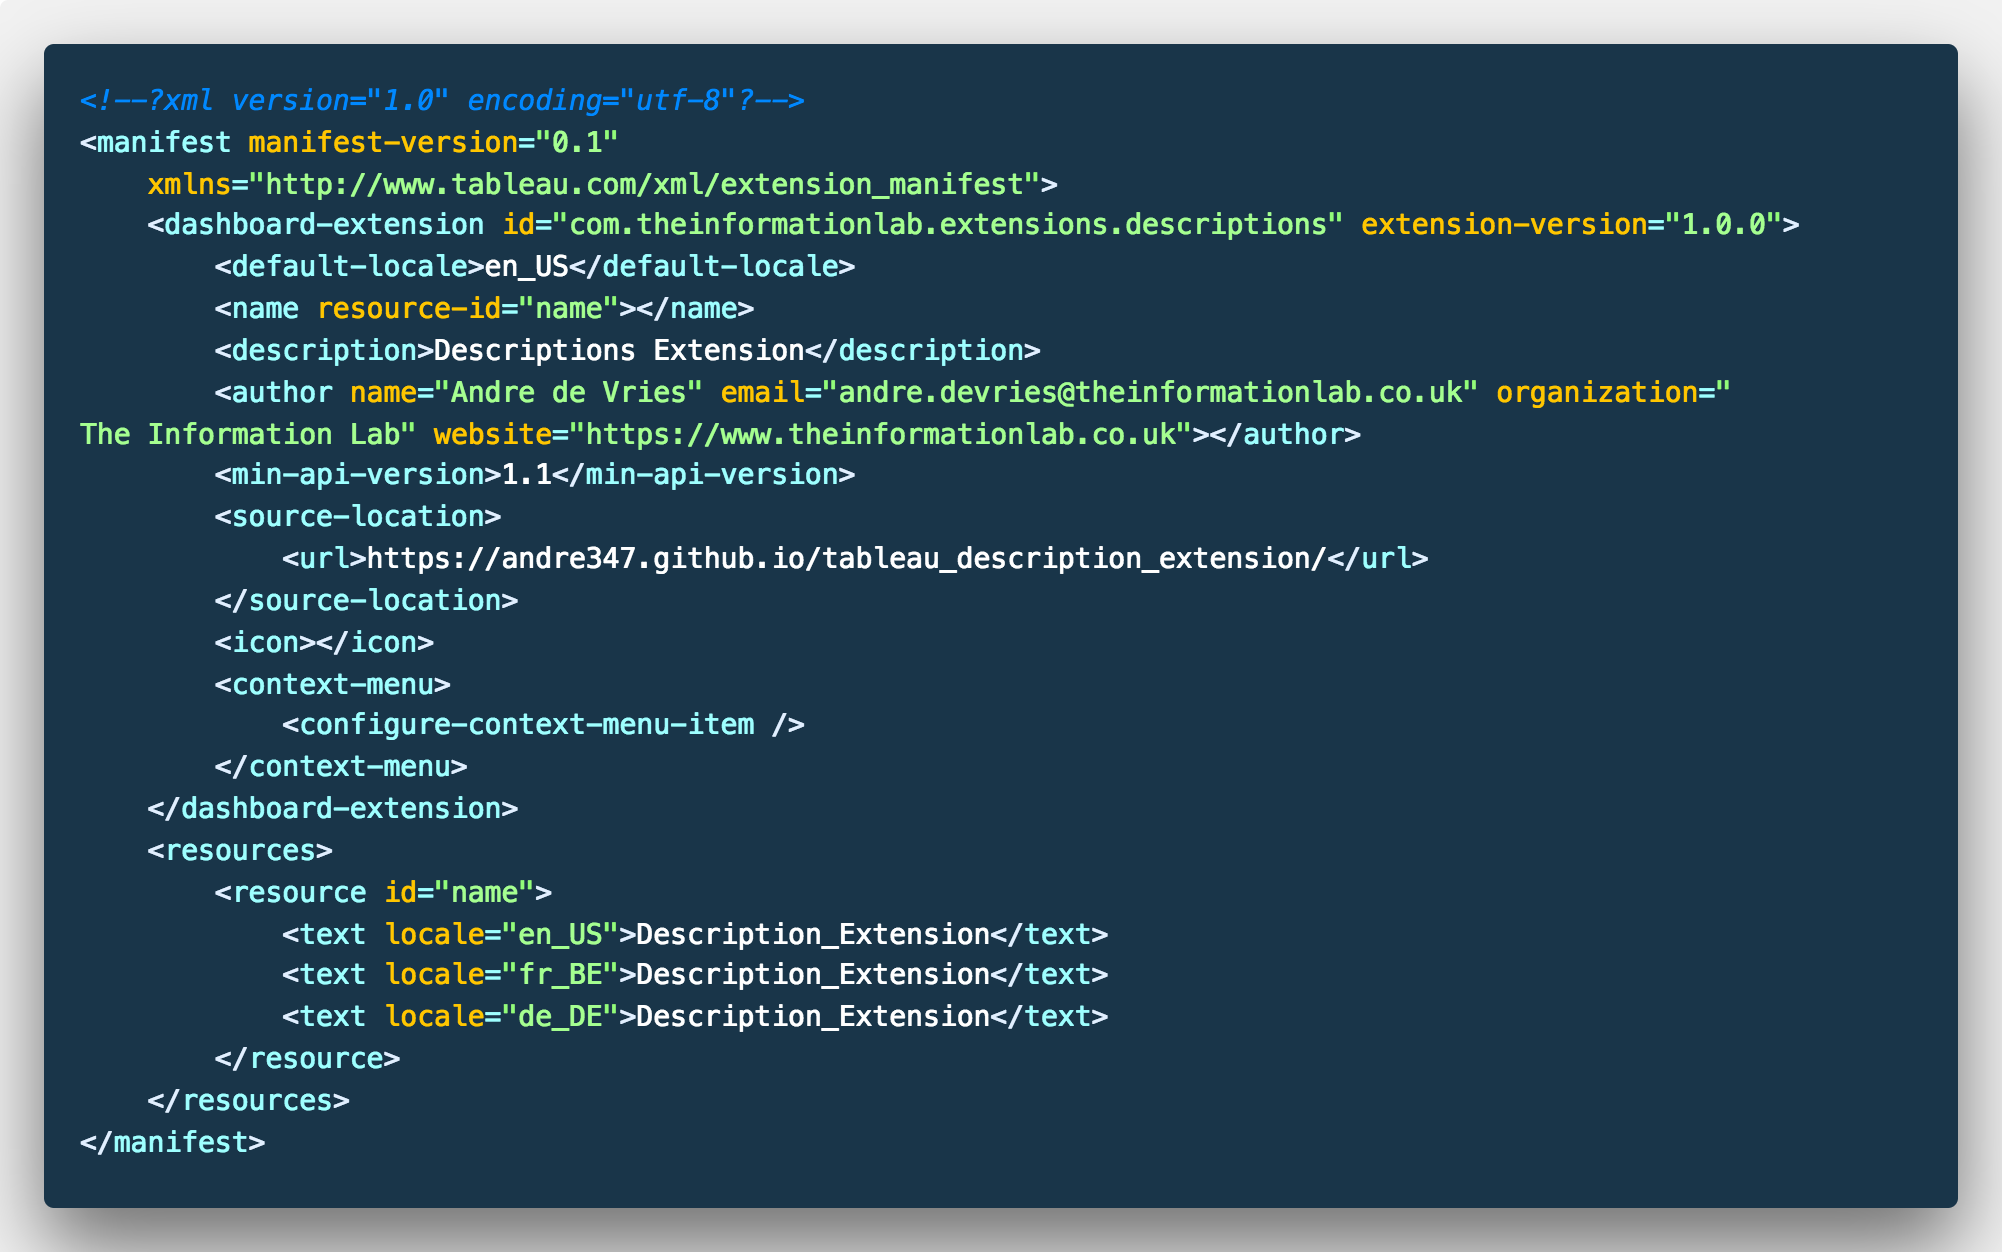
Tableau has a great Github page full of information about the Extensions API. Hats off to them for creating such a detailed documentation and this really helped me when I started developing extensions. A trex file is an XML file that looks as follows:
What I tend to do when I create a new extension is to copy the XML from the previous one and just change some of the fields. However, if you prefer to have a user interface that automatically generates a trex file for you, then head over here. This website was built by my colleague Craig Bloodworth.
What are the building blocks of the trex file?
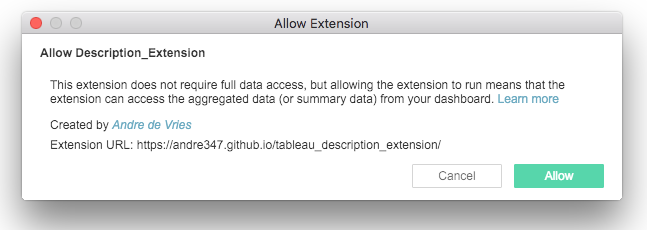
Tableau uses the meta data in the manifest file to register you extension. This means that every time you add a new extension to your dashboard you get a pop up message asking you for consent.

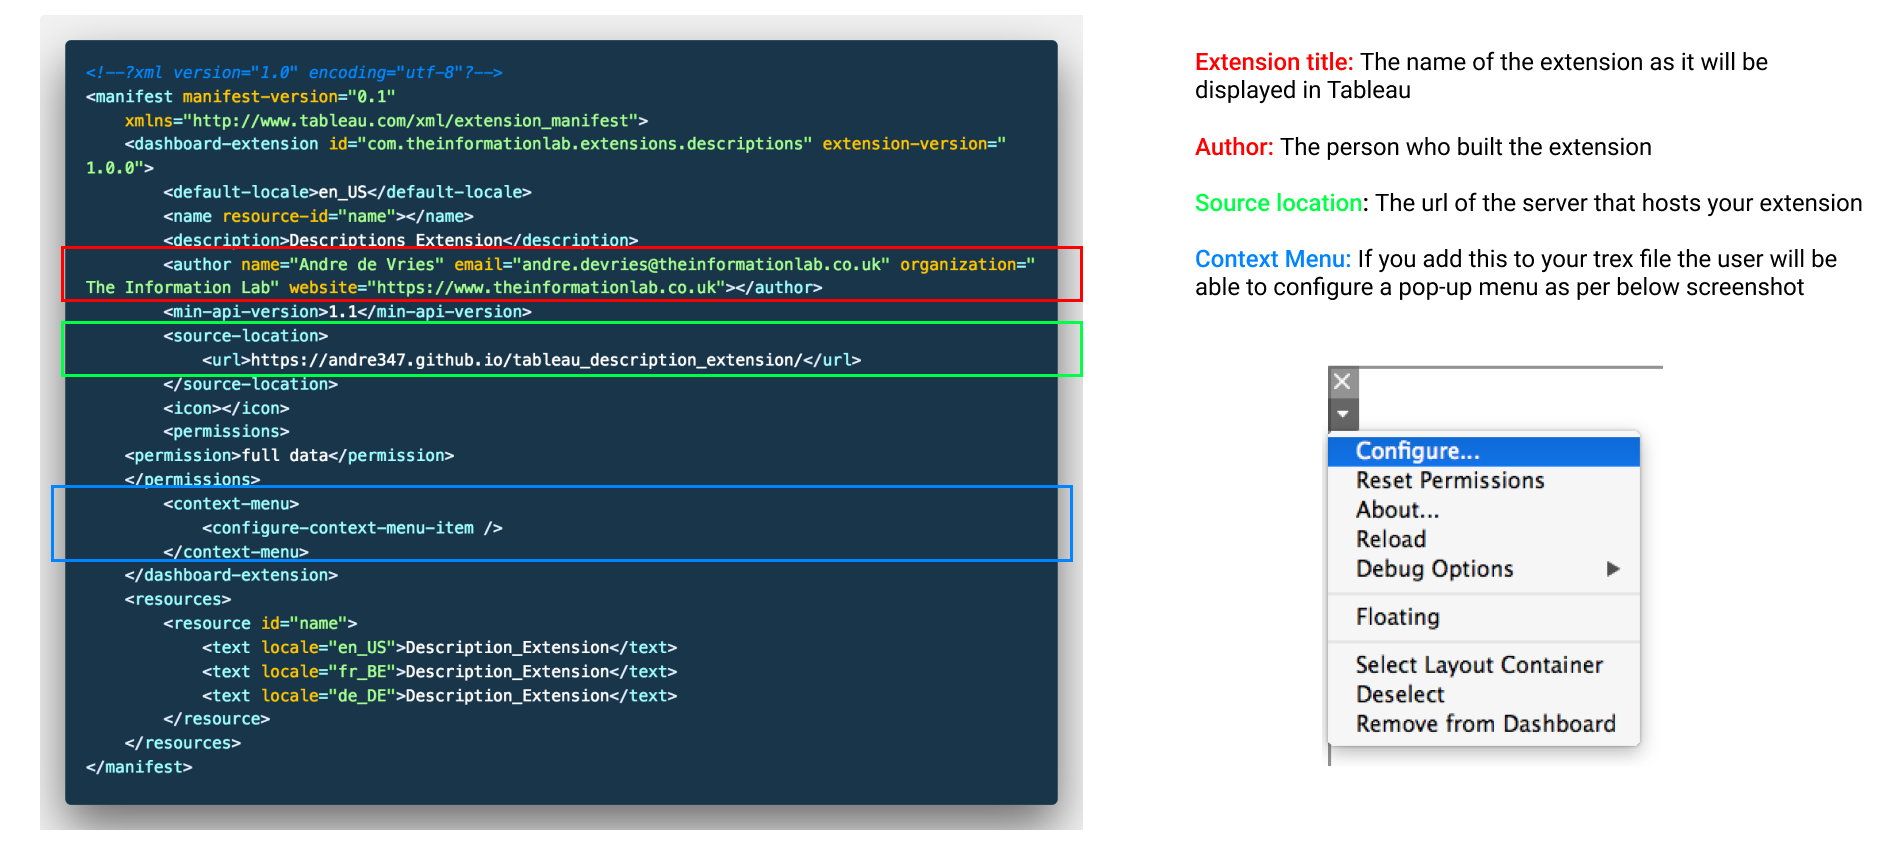
In this pop up screen we can see some information that is also contained in the .trex file. But there's more. I created this image to highlight the important fields you need to fill in.
What about permissions?
As you can see on the image above, there is a tag for permissions in the trex file. There is however, only one option; which is 'full-data'. This means that you will grant the extension permission to access the underlying data. The API calls that are enabled then will be: Worksheet.getUnderlyingDataAsync(), Datasource.getUnderlyingDataAsync(), Datasource.getActiveTablesAsync(), Datasource.getConnectionSummariesAsync(). The user will then be presented with the follow note when they open the extension:

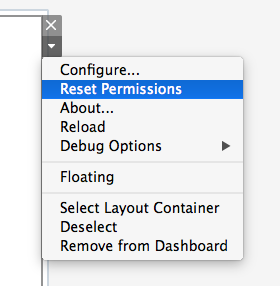
However, if your extension doesn't need access to the data then you can leave this permissions tag out of the file. As an extension user you can also revoke the permissions, or re-apply them. You do that by using the Configure menu and then click 'Reset Permissions'

Understanding how .trex files work is just the first step to learning about Tableau's new Extension API. You will therefore see more blog posts related to this new exciting addition to the product in the future. The extension that I used in the images in this blog post can be found on my Github page.

